Today is the last day of September (how did that happen so quick?), and also the last day of the NY Locavore Challenge – I just learned more than 1,400 people across NY State were involved. In addition to taking on a 250 mile diet (you are allowed a few exceptions to make this possible, and many days without additional effort I found we were already eating this way), there were a series of mini-challenges proposed to participants. What I became increasingly grateful for over the coarse of the past month is how these activities are a part of our lives. We’re already doing all of these things:
- Shop at a Farmers Market, Farm Stand or U-Pick
- Dine at a Locavore Restaurant
- Join a Food Co-op
- Eat (at least) 5 Servings of Local, Organic Fruit & Veggies per Day
- Cook with Local Oils, Grains, Meats & Cheeses
- Sip on Local Milk, Juice, Beer, Wine & Spirits
- Swap Sugar for Local Honey & Maple Syrup
- Try Food Preservation (Canning, Freezing, Drying)
- Grow an Herb Garden
But there was one challenge that jumped out at me from the start, something I don’t already do:
- Make Your Own Butter, Yogurt, or Ice-Cream
Years ago Brad and I got an ice cream maker. One summer with an over abundance of peaches from our CSA, we made peach ice cream. It was divine, but we never did it again. And lately Brad and I have been talking more and more about making our own yogurt – we eat a lot of it – but we have sources for such amazing yogurt at our Food Coop, that it seems like it’s not worth the effort. So here I was thinking this would be my challenge, when I stumbled across a recipe in the September issue of Bon Appetit for D.I.Y. Ricotta. Make your own…cheese? Why not? Fresh ricotta is one of those things I’ve always loved and intended to learn to make on my own.

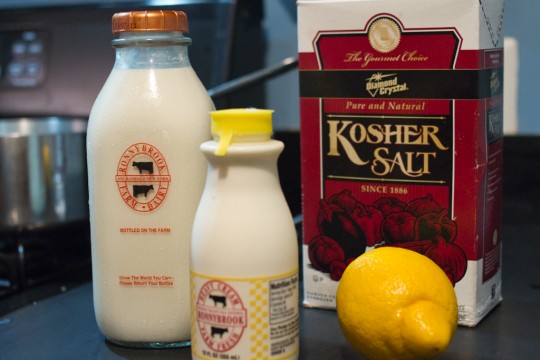
What sold me on this recipe was how EASY it looked. It called for 4 things; milk, cream, salt and lemon juice. And it sounded so doable. So like a good little locavore I got myself some Ronnybrook milk and cream, and the other night I set to it. I followed the recipe and heated the mixture and then let it rest so the curds and whey could separate. Problem was it didn’t seem to be curdling. At that point I went online and saw that there were several comments on the recipe from people saying it didn’t really work. It didn’t produce the curds it was supposed to, even with the addition of more acid and a second heating, and that the yield from all that milk was disappointing – 5 cups reduced to a half cup. I kicked myself for not looking this up earlier and feared that I would be wasting all that precious milk and cream.
You may not know this about me, but I’m a bit competitive. I only like to do things I’m good at. And you know what else, I hate a bad recipe! So I finally had it, a real challenge.

I headed back to the kitchen and I added more lemon juice to the mixture, then I returned it to the stove to come to a boil for a second time and set it to cool. This time there was some action. I gently spooned the curds into a cheesecloth-lined mesh sieve, thinking that I had broken the whey up too much in my doctoring. And determined to get a better yield than the other cooks, I took the remaining milk mixture in the saucepan and I poured it through a second cheesecloth, then I added the whey that collected from it to the first batch. I let it all sit, worried that it looked too liquidy and runny, and I went to watch a few episodes of Breaking Bad (yes, thank you Netflix, we’re now hooked too). Now the recipe mentioned that the longer you let it sit and drain, the thicker and richer the ricotta will become. When I came back to check on it several hours later, I found thick, rich and hella creamy ricotta waiting. Even better, it was a generous cup’s worth. Success!
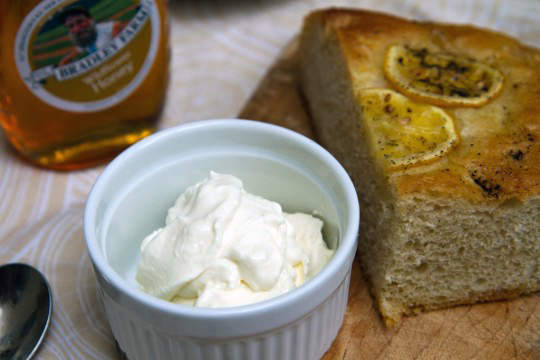
The next morning we enjoyed the ricotta with some damn good focaccia from Scratchbread and a big drizzle of Ray Bradley’s wildflower honey. It was a beautiful morning and the ricotta could not have been more delicious. Life is good when you’re a locavore.

*I’m not sure I’d recommend this recipe, since the results seem to be mixed. But with the addition of the 2nd tablespoon of lemon and using Ronnybrook Farm’s whole milk and heavy cream, mine turned out pretty amazing. I’ll try repeating it again soon an would love some tips, tricks or recipes from any seasoned ricotta pros out there.
***
As I mentioned at the start of this month, the Locavore Challenge was not so much challenging for me – our lives already revolve around local food and the people who grow and bring it to us – as it was a month of awareness and, as it turned out, appreciation.
I can’t write about eating local without reminding you all of the many upstate farmers who are still in need. There have been several great articles about my friend Ray Bradley this week, in the New York Times and on Gilt Taste. I also recommend you watch this incredibly moving video from The Perennial Plate. For a growing list of ways you can offer support, check out my post, The Rally to Support Farmers Post-Irene.


amanda says:
maybe when you are here we can make mozzarella?
Heather says:
Yes! It’s time we tackle this project!
Dan says:
Hi, saw your link on NOFA facebook and thought I might chime in.
I have been making ricotta in volume for a bit and can share a few tips I picked up along the way. Things to make your life a bit easier:
A perforated pan or colander (large enough to hold the volume of liquid you’re starting with).
Enough cheese cloth to do two layers.
So the first thing I like to do is unfold the cheesecloth, then rinse it and wring it dry. This will remove any thread particles that you don’t want in your cheese. Once you have that, drape it over your pan or colander so there is plenty of an overhang, then double back so you have two layers.
It helps to think in terms of ratios. For the ricotta it would be 4 parts milk, to 1 part cream i.e. 4 cups milk 1 cup cream or 4qts milk 1 qt cream etc. Put your dairy and salt to taste in a larger then necessary pot in case it decides to boil over on you.
Apply moderate heat so not to scald the bottom of the pan. Once it starts to simmer add your acid, lemon or white balsamic works nicely too depending on how you’re serving the cheese. I use about a half a cup for 1.5 gallons of the milk mixture.
A successful curd will reveal an almost bluish whey like a very thin skim milk in between the curds when you gently move them around. If it looks like chunky whole milk try bringing it back to a simmer before adding more acid as too much can give it an off taste.
Once you have your curd let it rest for a few minutes in the pot. Place your colander inside a larger pot to collect the whey as it strains (reserve for a lighter take on mash potatoes with a little Dijon mustard), then gently and slowly pour the mixture into your cheesecloth lined pan. It will be very hot!
Make sure the colander is able to drain. You may have to dump the collected whey into another container periodically.
I find that if you let it rest longer than an hour or so in the cheesecloth it begins to get a bit too dense and lose the lovely wet curd quality that a good ricotta should have. It’s ok if it looks a bit wet when hot, if you transfer it to a Tupperware container and let it cool in the fridge it will tighten up. And you can always strain it more if you need to. But you can’t get the texture back if it dries too long. Although you can let it strain overnight and press it with herbs for a nice farmer’s cheese but that’s another story…
Mixed with some good olive oil, sea salt and cracked pepper and I am a happy man! Hope this helps!
Heather says:
Thanks so much Dan, you sound like a pro :) There are a ton of great tips here (including saving the whey for another use!), I definitely need to take another stab at this soon.
Daughter Fish says:
Next time you want to try this out, I volunteer as a taster! This looks delicious.