Life and Death in Pig Farming

It’s been a long hot summer and I’ve been away from my husband and my home in Brooklyn for nearly five months. Fueled by raw goat milk and a regular supply of good meat, I’m stronger (and tanner) than I was when I arrived at the farm, and I’m closer to the food I eat than I’ve ever been before. There are hundreds of animals here that we raise for meat and they all depend on us for their livelihood. I move about my days alternatively caring for these animals and making food from them.

Last week I spent a morning gutting chickens, tried a new trussing technique for hanging salumi in the aging room and practiced cutting down a whole side of pork. I also castrated four piglets, which is an unpleasant but necessary task that I do here. We breed hogs to raise and eventually butcher for sausage, bacon, salumi or just good old pork chops for our CSA members. While these pigs are out on their own, rooting around and fattening up, we can’t just have them getting knocked up or else we’ll be slaughtering pregnant pigs.

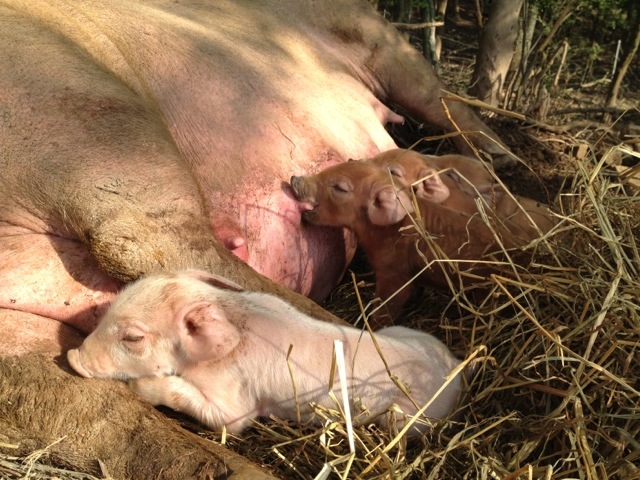
Our sows, or mama pigs, live in their own area with a boar named Boris. Here they are encouraged to copulate, give birth to piglets and look after them. After a good amount of time in the pig nursery (as I like to think of the sow pen, one of my favorite places on the farm), we ween the teenage piglets and train them to respect electric fencing. Eventually they join the other adult pigs in the the woods where they spend their days eating, snoozing and generally being piggy until they grow to full weight.

Every other day we move the feeder pigs to fresh pasture. It’s a practice called rotational grazing and it’s how we raise our animals – it’s good for them and the land. This is a chore that involves tromping around in the woods, stomping in fence posts, reeling and unreeling the fence lines and ushering the pigs into their new area. I more or less live in muck boots, which makes it easy to not care about stepping in poop all the time. And when the pigs occasionally decide they’d like to go wallow in the creek or forage somewhere else, we might spend a morning chasing them down and herding them through the forest back to their temporary home.

I knew I wanted to butcher animals and connect more people to healthy, sustainable meat when I moved here. What I didn’t know is how much of a liking I would take to pig farming, or how much joy I would get watching piglets grow from fumbling little babies in search of their mother’s milk to mischievous little teenagers who sneak up to the farm house to eat pears that are falling from the big tree. And despite all of this, how I would grow to accept the death of these precious animals. For even without butchering and in spite of our constant efforts, mortality is a regular part in livestock farming.

I believe more than ever in the importance of the goals that brought me here and I guess you could say I’ve taken to this lifestyle that is now mine.

Chicken Chores

The biggest constant in farm life is chores. Every day begins and ends with them, as there are certain tasks that must be done to keep the farm running, and in our case, the animals happy and healthy. For the first 6 weeks or so at North Mountain Pastures, my chores centered around caring for our broilers (that’s what we call the chickens we raise for eating).

You can never have enough peeps

It all started with the peeps. 275 of these little newborn chickens arrive on the farm every week or two and they need to be transfered to the brooder – the warm cozy place made of recycled cooler panels and propane heaters where we keep them until they’re big and strong enough to move out to pasture. Perhaps the sweetest task is introducing these guys to their new home and dipping their tiny little beaks in water so they know where to find a drink after that.

Once they’re settled in, they need to be checked in on and fed both morning and night. I’ve had mornings where I’ve chased escaped peeps through mucky corners, cursing their ability to just elude my grasp every time I nearly have them cornered. I’ve also spent mornings tallying a death toll, like when the propane for the heater ran out on a cold night, or when our laying hens were breaking into the brooder to steal feed and bullying the little peeps in the process. But most of the time I find them contentedly chirping and eagerly awaiting breakfast.

Mobile chicken houses

After a few weeks, the peeps grow to be little chickens and we transfer them to what we call the chicken tractors – Hoop houses we’ve retrofitted to give the broilers cover from rain and predators, while also giving them plenty of access to run around and eat all the bugs and grass they want. Everyday we use a skid loader (for which I’m still awaiting a driving lesson) to drag the chicken tractors forward one full length to fresh pasture and in exchange they leave behind plenty of precious fertilizer.

The meadow they’re currently circling will eventually be full of rich topsoil and new grass that we can allow the other animals to graze on – in fact, I just noticed yesterday that dark green grass is already springing up where they was only dirt and poop only six weeks ago. These guys also eat loads of feed made locally from organic grain and minerals. Keeping them fed makes for a good workout when you’re hauling buckets and buckets of the stuff.

Are these chickens happy or what? I took this little “bird’s eye view” video one day as the broilers were excitedly tromping around on their new home in the meadow.

Eventually the broilers grow to their full size and it’s time for butchering. This is not a chore but a whole day of processing to ready the birds to be eaten. The night before butchering we head out to the tractors and round up the biggest broilers into crates – chickens are pretty sleepy after dark and there’s a lot less chasing when you catch them at night. The following day we’ll all work together, assembly-line-style, to slaughter, eviscerate, package, weigh and label hundreds of broilers which will eventually make their way into the kitchens of our CSA members.

It’s an intense day, full of blood, guts and feathers, but satisfying when you can see just how much you’ve accomplished at the end. The first time I participated in a butchering day, Brooks trained me to slaughter and I worked my way through 2 crates of laying hens, which are now stewing hens. But generally my place in line has been on the evisceration table where I’ve gotten pretty swift at removing guts and sorting organs. I’ve also been tasked with cutting up chickens for CSA shares, which we do regularly in addition to providing whole broilers for roasting, or better yet, fried chicken.

All ready to roast

Another new skill I’ve acquired in this whole broiler operation is the ability to snatch chickens up by their feet and hold 4 or 5 of them in one hand. The first time I saw the guys doing this I thought I’d never have the reflexes to catch those zippy little birds – but when I had to move 250 or so chickens to pasture I got the hang of it pretty quick. But enough of these chickens, I’m now moving on to the pigs.

***
Bonus photo for those who are not faint of heart

If you’re wondering how we do it, here’s Brooks on slaughter and Anna on evisceration.

Perfect Together: Asparagus and Chives

When Brad and I designed the WordPress theme for this website, I drew those little asparagus in the top corner to celebrate the season. It’s hard to believe, but the asparagus have sprung again and an entire year has already passed since I started this blog.

Here on the farm I discovered wild chives growing all over the place just as the first asparagus arrived. I foraged (Yes, foraged! From right outside the farm house. Now that’s some seriously local country food.) handfuls and paired the chives with asparagus in a wonderful Spring pasta with some Pecorino Romano cheese. That combination has been a favorite ever since. Here are a few ideas so you too can savor the season and get a whiff of asparagus pee.

Sauté them:
Use the asparagus whole with only the tough ends trimmed or snapped off. Roll them in a skillet with olive oil over a medium-high heat until they’re bright green and tender but still a bit crisp (about 5 minutes). Toss in a pad of butter to melt, salt to taste and transfer them to a serving plate scattered with chives and a few shavings of Pecorino Romano cheese if you so desire. Deliciousness doesn’t get much simpler.

Blanch them:
Cut the asparagus into 2-inch pieces and cook in salted, boiling water until just tender (about 2-3 minutes) then transfer them with a slotted spoon to an ice bath. Cook some pasta (any type of short noodle like penne or fussili), and toss with the asparagus, a few handfuls of minced chives, a generous cup or so of grated Pecorino Romano cheese and a glug of olive oil. Add a healthy grating of black pepper and some lemon zest and you’re in business.

Roast them:
Cut your asparagus and some potatoes into 1-inch pieces. Toss them with some olive oil, salt and pepper and roast them at 450 degrees for about 20 minutes. Stir them once or twice, and when they’re almost done, sprinkle some Pecorino Romano cheese over top and continue to roast for a few minutes more until the cheese is melted and golden. If you can hold back from finishing them off, you can toss the leftover asparagus and potatoes into your morning omelet or scrambled eggs with some chives.

New Life on the Farm

I’m not talking about my new life on the farm. These hungry little piglets were born yesterday.

I watched for about an hour and saw one birth, and how they all scrambled around in search of the boob and warmth. There were 14 in total and 12 made it through the night.

Eventually they’ll grow up to be big pigs and we’ll make salumi out of then, but right now they’re really cute.

20120517-213636.jpg

Spring Brunch: Eggs in a Nest

Spring is my favorite time of year for eating eggs fresh from the farm. The chickens are feasting on grass and bugs galore and you can taste all the new growth and life in their rich golden yolks. Between the production of our “layers”, AKA egg-laying hens, here at North Mountain Pastures, and the many Amish farmers in the area, we eat a lot of eggs. I typically start each day with two fried in lard, or the occasional scramble or omelet if I’m feeling ambitious.

Meanwhile, back in Brooklyn, our pal Ray Bradley provides Brad with eggs, and they are absolutely at their prime right now. On a recent weekend visit home, after our usual dog walk/Greenmarket Saturday morning routine, Brad and I set to making brunch. Inspired by a pile of gorgeous green spinach, tiny fingerling potatoes and a nice bunch of chives, I decided to stray from my ritual frittata and opted for another old favorite – eggs in a nest. Just perfect for enjoying on a lovely Spring day.

After much trial and error, I’ve found that 9 minutes is the perfect time in my oven to have the egg whites set but the yolks nice and runny. You can easily make this for four people; just double the ingredients and choose a large enough skillet to have room for eight little egg nests. Often I’ll sauté ingredients for 4 servings, then remove half and save them to make a nest for more eggs the following day.

Eggs in a Nest

Serves 2 hungry people

  • Oil or fat for sautéing
  • 1/2 lb. potatoes, scrubbed and cut into 1″ pieces
  • Salt
  • 2 cloves garlic, minced
  • 1 lb. spinach, cleaned, tough stems removed and coarsely chopped (you can use any greens you like, just adjust the cooking time until they’re nice and wilted)
  • 4 eggs
  • 2 oz. goat cheese (optional)
  • Chives, finely cut or minced (optional)
  • Fresh ground black pepper

Heat the oven to 375 degrees.

In a medium, oven-proof skillet, heat a few tablespoons of oil/fat over medium heat. Add the potatoes, season with salt, and sauté, turning occasionally until golden and just tender. Remove the potatoes using a slotted spoon to a bowl and reserve. In the remaining fat, add the garlic, stirring for a moment, then add the spinach and sauté, stirring frequently until just wilted. Return the potatoes to the skillet, and toss to combine.

Turn the heat off and use the back of a large spoon create 4 “nests” or indentations around the pan. Gently crack and egg into each nest. Crumble the goat cheese, if using, around the eggs over the spinach and potato mixture, then transfer to the oven. Cook for 9-10 minutes until the whites are set but the yolks still jiggle when you shake the pan. Remove from the oven, salt the eggs if desired, crack fresh black pepper over the pan, and scatter the chives over top.

Serve in the pan with crusty bread and butter on the side and a big spoon for scooping the eggs and other goodness onto plates.

Odds, Bits and Balls

When we’re not working on the farm, we’re usually eating. This is my kind of place.

Calves and cows on pasture

Several times a day we gather around the table, and as you might expect, there is plenty of meat, goat milk, cheese and eggs at every meal. We also eat our fair share of veggies and a wonderful kitchen garden is just beginning to sprout from seed out behind the farm house. Anna does a lot of the cooking, although I’ve jumped in for the occasional meal as do some of the guys on the farm. It’s mostly improvisation using cuts of meat that we didn’t sell at market or use in CSA shares, and the occasional leftover odds and bits from the butcher shop.

The thing I love about this bunch who I now share my days and meals with is that they’ll eat anything. It’s not on account of foodie bravado, just genuine nose-to-tail awareness – certainly we can find a way to use the leftover parts of the animal and make something delicious. The first week on the farm we had a delicious dish of rice with chicken hearts and livers after a day of cutting up whole chickens for CSA shares. The following week we enjoyed pork tongue tacos that were salvaged from the butcher. When braised, then sliced, fried and served in warm, homemade corn tortillas, tongue is truly tasty. This week we took it to a whole new level – a first for everyone around the table – when I made us Rocky Mountain Oysters, aka fried bull testicles.

North Mountain Pastures "Oysters"

The butcher gave us the sack of balls while we were in the shop making sausage last week, and of course the North Mountain Pastures crew was game to see what we could make of them. But a few days later when they were still in the fridge, I realized that none of the guys could bring themselves to actually prepare the testies, and Anna was certainly not jumping at the task. What is a food-loving butcher wanna-be like myself to do but offer to cook them up? And so after a Google search for “how to cook cow balls” and a bit of recipe cross-referencing, I had a plan and I set to work. The following day when I put the plate of crispy fried “oysters” on the table, they were gingerly sampled and then enthusiastically devoured. It certainly didn’t hurt that I battered them with corn meal fried them in lard, but it turns out that bull testicles really do taste good.

Should you find yourself with a spare pair of balls and feel like you’re up for the task, here’s my recipe:

North Mountain Pastures “Oysters”

  • 2 large bull testicles
  • 2 tablespoons salt
  • 1.5 cups masa harina, or fine cornmeal
  • 1 cup milk
  • salt
  • pepper
  • cayenne
  • lard or neutral cooking oil (for frying)
  • hot sauce for serving

Split the tough skin-like muscle that surrounds each “oyster” with a sharp knife and peel off.
Soak in a pan of salt water for at least 1 hour, up to overnight and drain.

Slice each oyster into 1/4 inch thick ovals. Combine cornmeal, salt, pepper and a pinch of cayenne to taste. Roll each slice into cornmeal mixture, dip into the milk, roll again into flour mixture (repeat the procedure for a thicker crust).

Heat 1″ of fat or oil in a heavy skillet or pot until glistening and fry, turning once, until golden brown – a few minutes in total.

Drain on paper towels and sprinkle with salt. Serve with hot sauce sauce if desired.

Planning to Leave: Veggie Burgers

I had about a month after deciding that I was going to leave Brooklyn, and Brad, to live on a farm for 8 months before I was expected there. It was a decent amount of time to mentally prepare and also get my affairs in as much order as possible. Primarily Brad and I went out for as many dinner dates as possible.

But when it came down to it I only actually accomplished 2 things in preparation for leaving my home and my kitchen to fend for themselves in my absence. I cleaned my pantry cabinet and made a batch of veggie burgers for the freezer. After that, I was able to pack and leave with some comfort that Brad would be able to identity the barley vs. the quinoa in the cupboard and would also have some pre-made single man dinners on hand.

Veggie Burgers

You can make these with different root veggies (just make sure you have roughly the total quantity called for). They are delicious, they freeze well and can be warmed in the oven for a quick weeknight meal. They pair well with a nice salad and a cold beer.

(makes 12-16 burgers)

  • 4 carrots, grated (about 2 cups)
  • 4 parsnips, grated (about 2 cups)
  • 1 large sweet potato or small winter squash, grated (about 2 cups)
  • 1 large onion, chopped
  • 3 cloves garlic, chopped
  • 3-4 tablespoons olive oil
  • 2 eggs
  • 1 teaspoon cumin seeds
  • 1 teaspoon coriander seeds
  • 1 teaspoon fennel seeds
  • 1 teaspoon caraway seeds
  • 1 teaspoon sesame seeds
  • 1 cup bulgur
  • salt to taste
  • 1 each handful parsley and ciantro, chopped
  • whole wheat english muffins, good cheese and Dijon mustard for serving

Heat the oven to 375 degrees.

Soak the bulgur in warm water for 15 minutes, drain well.

Combine all veggies in a large bowl and toss with 2 tablespoons of olive oil. In batches, pulse in a food processor adding 1-2 tablespoons more oil only as needed to process until coarsely chopped and moist. (If it’s too wet, they’ll be mushy). Return mixture to large bowl. Mix in 2 eggs, bulgur, seeds, chopped herbs, salt and pepper. Use your hands like you would with any burgers to mix until well combined. If it’s dry and not sticking, add more oil.

Form the mixture into balls, and place on a non-stick baking sheet (or line a baking sheet with parchment paper). Press flat with the palm of your hand to form patties. Bake for 30-40 minutes, or until the patties are soft and golden brown. Serve them on english muffins with good cheese and Dijon mustard.

When cool, layer any uneaten burgers in a flat container with wax paper between them and freeze. To cook from frozen, place the burgers in a 375˚ oven until warmed through, about 20 minutes.

City Girl Gone Country

Apologies for the dramatic pause, but I’ve been in a bit of a transition over the past few weeks. A new and dirtier chapter of my life has just begun. I’m going to attempt to tell you the story of how I got to where I am now – in a trailer, on a farm, in central Pennsylvania – in a paragraph. Here goes…

A view from my humble new abode

You may recall that I’ve taken a serious interest in butchery. Well, back in January I started looking for opportunities to continue learning and turned over every rock I could in search of some kind of apprenticeship. I got a lot of encouragement and met some great people in the process (like the very awesome founders of The Butcher’s Guild) but my quest was otherwise unsuccessful. Then one day I came across a Kickstarter campaign that led me to Brooks and Anna – two young, smart, ambitious farmers who are dedicated to sustainable agriculture and traditional meat processing. And so, after many emails, a visit to the farm, and much planning with my very, very supportive husband, I have just begun an apprenticeship at North Mountain Pastures. I am now a student of farming, butchery, meat curing and a whole new pace of living.

Pastured pork, up close and personal
Farm fashion

For the next 7+ months I’ll be living hours away from the city that I call home. I’m taking leave from my life with Brad in Brooklyn to pursue this solo mission. Now my days are spent working on a farm – there are chickens, pigs and cows to feed and move to fresh pasture, eggs to collect, goats to milk, not to mention sausage to stuff and salumi to cure. A chicken butchering day is on the horizon but for now we’re busy with projects like building mobile chicken shelters, finishing out the new butcher shop and getting the trailer (my new place of residence) in order. For this I’ve dug some holes and spent hours wielding an angle grinder. In between all the work, meals are shared around the table in the farmhouse with a group of people who are slowly becoming my new family.

Not all peeps are made from marshmellows

There will be many tales to tell and I’ll be sharing them here, but for now I’m still settling in and getting used to stepping in ankle deep muck and chicken shit to catch escaped peeps while performing my morning chores.

Last Minute Inspiration: Grilled Lemongrass Beef Lettuce Wraps

When Brad and I are both working in the studio together, an all too typical evening as we approach dinner time usually goes down like this:

While basking in the glow of our computer monitors…
7:14
Me: Hey it’s getting late, what do you say we shut down and go have a life. Brad: Uh huh…
7:43
Me: Have you seen the time? We really ought to stop. Brad: Yeah, OK…
8:02
Brad: Whoa, it’s 8:00. Me: Yeah, I know, we really ought to quit working. Brad: What are we going to eat for dinner? Me: I don’t know, I didn’t have anything planned…
8:27
Me: I’m starving and we really need to go home. Brad: OK… Me: I’m packing up. Brad: Me too.
8:35
Brad: Hey, can I just show you something real quick? Me: Dude, I thought you were packing up…
8:42
Me: Seriously, I’m leaving. See you at home. Brad: OK, yeah… I’ll be there soon.

Needless to say, many meals at Chez T get started late. And while sometimes I have a plan and supplies in the fridge, last Friday was an even worse case where I had no plan and and no groceries to improvise with. Typically I would suggest “The Pasta” or some other household staple, but it being Friday night and all, we were both in the mood for a little something special. You know, the kind of something special that you can start shopping to cook at 9pm.

Brad flipped through some of our cookbooks and suggested a grilled pork and green papaya salad with rice noodles. I liked the idea, but with a quick glance over the ingredient list I knew we’d never find half the stuff. But we wrote it down, and headed out, in search of last-minute grocery store inspiration.

Sure enough, there was no green papaya or jicama to speak of. And the pickings for pork (which our Food Coop sources from local farms, so you tend to get what cuts you can get on any given day) were slim. But there were some good looking grass-fed skirt steaks. And the lemongrass and ginger for the marinade could both be had. We liked the idea of rice noodles and crisp, leafy butter lettuce, but we needed additional fresh accents. While trolling the produce section I spied a box of kumquats. These tiny little citrus fruits can be eaten whole (the rind is sweet and the fruit is sour), and I love to slice them and use them in salads. Confident that we now had a solid plan, Brad scooped up some passion fruit sorbet for dessert, then we checked out and headed home.

Despite the lengthy ingredient list (several of these items are staple pantry goods for many Asian dishes), this meal came together for us in about 45 minutes. We drank some sake, put on a movie, and sat around our coffee table on pillows assembling lettuce wraps and happily licking out fingers. The leftovers kept well, stored in separate containers, and the next day we enjoyed everything again as a wonderful cold lunch on a warm spring day.

Grilled Lemongrass Beef Lettuce Wraps

Serves 4

  • 1 lb. skirt or flank steak, thinly sliced
  • 10 ounces dried rice noodles
  • 1 head butter lettuce, washed and separated into leaves
Marinade:
  • 1 teaspoon grated ginger
  • 1 teaspoon grated garlic
  • 1 stalk of lemongrass, halved, sliced and minced
  • 1/4 cup Japanese soy sauce
  • 2 teaspoons sesame oil
  • 4 teaspoons sake
  • 4 teaspoons sugar
Toppings:
  • Cilantro leaves
  • Thinly sliced kumquats
  • Thinly sliced red onion
  • Also consider: green papaya, cucumber, jicama, mango, roasted and chopped peanuts
Dressing:
  • 6 tablespoons rice wine vinegar
  • 2 tablespoons sugar
  • 2 teaspoon Chinese chili paste
  • 1 teaspoon nam pla (fish sauce)

Make the marinade by combining all ingredients in a bowl or large ziploc bag, add the sliced beef and toss to mix well. Cover (or seal) and refrigerate for 20 minutes.

In the meantime, set a pot of water to boil for the noodles and prepare the toppings. Prepare the dressing by combining all the ingredients in a small bowl and whisk to combine.

Heat a grill or grill pan (I use our cast iron grill pan which works nicely) over high heat.

Cook the noodles in the boiling water according to package directions, transfer them to a colander, rinse them under cold water and drain well.

Working in batches, grill the beef for about 1 minute per side (this will leave it beautifully medium rare, but give it more time if you desire) and transfer to a platter to rest. *If you’re using a grill pan, the sugar in the marinade may start to collect and burn on the ridges after your first few batches, carefully wipe the pan clean with a damp paper towel if this happens and continue).

Place the noodles, lettuce leaves, and toppings on plates to share and serve, along with the plate of grilled beef and the bowl of dressing (put a little spoon in it). Give everyone a small plate and chopsticks, or necessary serving utensils. Using a lettuce leaf as a wrapper, pile a bit of noodles and a piece or 2 of grilled beef into it, then add the toppings of your choice and a drizzle of dressing. Fold, stuff, chew, enjoy, and repeat!

This recipe was adapted from a completely different, but also delicious looking recipe for Grilled Pork with Green Papaya Salad and Rice Noodles from “Takashi’s Noodles”.

Bootleg Farm Finds: Farro Fettuccine with Wild Mushrooms

A few weeks back my friend Margie invited me to the Old Field Farm Bootleg Buying Club. Old Field Farm is a 160 acre farm in upstate NY that explores the relationship of art and agriculture. This was not your average “meet the farmer and buy some things” type of event, but a show of collaboration, design and really, really good food.

OFF Bootleg Buying Club: Whole Hog Butcher Demonstration / Collection of Dried Mushrooms

We wandered around enjoying wine and various tasting tables of OFF products like prosciutto and a most decadent pork rillette. Eventually we made our way out back where a pop-up butcher demonstration and shop had been assembled by Jake and Silka, otherwise known as “The Butcher and the Baker” (be sure to check out their blog post with photos and details of the event). We watched as Jake broke down 2 whole sides of a Tamworth hog from the farm, and Margie eventually purchased a beautiful pork loin rack which he expertly Frenched and tied for her to roast.

The event also featured a beautifully curated shop of edible goods, pottery and books. Wandering among the honey, maple syrup, jams and other items, a curious display in the corner that caught my attention – jars and jars of dried mushrooms. There were Shitake, Chantarelle, Black Trumpet, Hen of the Woods, and several varieties I had never seen before, all of which I set to collecting a mixed bag of to take home.

I thought I would make a risotto with my new fungi collection (and perhaps I still will as another ounce remains), until the following week when Brad and I popped into Raffetto’s – a most magical Greenwich Village shop where you can watch fresh pasta be cut to order. He spied a farro fettuccine which we decided would be a perfect complement to the mushrooms and a different recipe began to take shape in my mind.

I gathered some fresh mushrooms, a mix of Shitake and Oyster, from our Greenmarket mushroom vendor to use in combination with the dried ones. I also threw in some peas from the last of my winter stash. I love them for both contrast in flavor and color, but if you want to enjoy pure mushroom mania, feel free to leave them out of the dish. Adding the liquid from soaking the dried mushrooms and bit of butter will result in a “sauce” that just coats the noodles and makes for one rich and earthy bowl of pasta.

Farro Fettuccine with Wild Mushrooms

  • 1 lb. dried farro fettuccine
  • 1 ounce dried wild mushrooms; a mix of Porcini, Chantarelle, Black Trumpet, Morel, or whatever you can find
  • 1/2 lb. fresh mushrooms, cleaned and cut into 1/2″ pieces or slices; Shitake, Oyster, and Hen of the Woods are all good choices
  • 2 cloves garlic, minced
  • Olive oil
  • Salt
  • 1 cup frozen peas *optional
  • 2 tablespoons butter
  • Fresh ground pepper
  • Fresh grated Pecorino Romano cheese

Place the dried mushrooms in a bowl and cover with 2 cups boiling water. Soak for about 20 minutes, or until tender. Strain the mushrooms, reserving the soaking liquid. Cut up any large mushrooms into 1/2″ pieces

Meanwhile, set a pot of water to boil for the pasta.

Set a large sauté pan over medium heat with a few tablespoons of olive oil. When a flick of water sizzles, add the fresh mushrooms and garlic and about 1 teaspoon of salt. Cook stirring occasionally until the mushrooms release their moisture, and then begin to dry out in the pan – about 6-8 minutes. Add the dried mushrooms that have been soaked and continue cooking for 2-3 minutes. Add 1 cup of the reserved soaking liquid and the peas, if desired, then continue cooking for about 5 minutes, allowing the liquid to reduce slightly. Stir in the butter to melt, season with additional salt to taste and a generous grinding of fresh black pepper and remove from heat.

When the pasta water comes to a boil, add a generous amount of salt and cook the fettuccine until al dente. Strain the pasta and immediately toss with the the mushroom mixture and a healthy grating of cheese. Distribute among serving dishes and serve with addition cheese if desired.

Although it is only mid-March, it seems undeniable that Spring has sprung! 70 degree afternoons are just perfect for enjoying a mid-day meal outside: