Adventures in Grilling: Make Grilled Tomatillo Salsa

Grilled Tomatillo Salsa

It’s been 6 summers now that we’ve been eating every breakfast, dinner, weekend brunch  – and now lunch! – outside from from April through October. But last Summer, after several weeks of record-breaking hot days in June, Brad and I finally got ourselves a grill, and it changed everything. Although I value the art and taste of cooking over hot coals, we opted for a simple gas grill for convenience. We also don’t have air conditioning in our brownstone garden apartment, so it seemed the most efficient solution for moving the kitchen outdoors during the hot months.

This summer our lovely garden was off limits to us during some construction in June, so we really just started warming back up to the grill over the past few weeks. I recently took a look through my food journal (yes, I have a food journal where I write down recipes, menus and all sorts of other strange notes) to see what I was making at this time last year. At the top of a page I had scribbled “Adventures in Grilling” (and yes, I am a dork, but this also gives you a sense of my enthusiasm level), after which there were several pages of notes, no recipes, just a laundry list of the dishes Brad and I enjoyed during our Inaugural Grilling Summer. Highlights included:

  • Grilled Masala Chicken Skewers with Cauliflower, Mango and Sweet Peppers
  • Grilled Swordfish and Baby Artichokes with Lemony Mint Caper Relish
  • Grilled Pizzas, with a variety of toppings
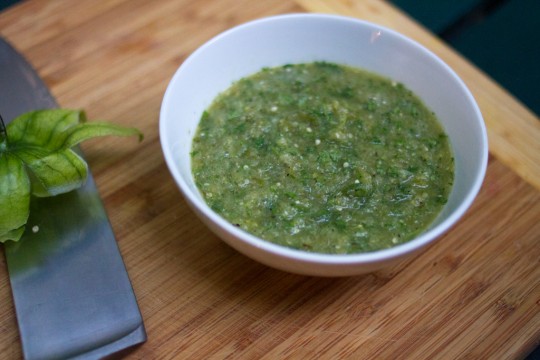
  • Grilled Pork Tacos with Grilled Tomatillo Salsa
A recent summer night in Brooklyn: Tomatillo Salsa over grilled salmon, grill "roasted" potatoes and a green salad with radishes and cucumbers.

Now that last one is a real winner. Looking back, I know we were eating that tomatillo salsa like mad. It goes great with grilled fish (scallops are our favorite, although just the other night I served it with grilled salmon), chicken or pork. For some simple summer goodness, grab yourself some tortillas, fold in some grilled meat, top with the salsa, squeeze some lime over that business and let the juice run down your arms as you dig into some bad ass tacos.

*I recommend Hot Bread Kitchen’s handmade corn tortillas. They are incredible (and also available at the Park Slope Food Coop for a steal).

Tomatillos, ready for grilling

Grilled Tomatillo Salsa

  • 4-6 tomatillos (depending on the size, right now they’re kinda small), halved
  • 1 onion, halved
  • 1-2 jalapeño peppers
  • 1 lime, juice
  • 1 garlic clove
  • 1 handful chopped cilantro

Grill the tomatillos and onions, cut side down (don’t turn them) until the tomatillos are tender and there are nice grill marks on everything. I like to throw the whole jalapeños on the grill too, turning them once or twice. In a food processor or blender, process the tomatillos, onion, jalapeños, garlic and lime juice to a course puree. Add water to thin if necessary, allow to cool and add the chopped cilantro at the end, just before serving.

*I put 2 jalepeño peppers in whole and it makes for some seriously spicy salsa. You could opt for 1, or slit them open and remove the seeds to take down the heat.

This salsa will get you going. And I hope to repeat some of those other gems and better document them this Summer. In the meantime, if you’re looking for grilling inspiration, check out this NY Times article from Mark Bittman. You’ll be surprised by how many different things that man throws on a grill. If you’re looking for taco inspiration, check out this article on Serious Eats and prepare to be hungry.

Bonus Points: Breakfast with Brad meets Reinventing Leftovers

We had leftover salsa, roasted potatoes, and some of those great tortillas. The next morning, Brad folded the potatoes into scrambled eggs and served them in warm tortillas topped with the tomatillo salsa. We call those breakfast tacos!

A Simple Summer Supper, Family Style

Most of the time when I’m cooking for more than 2 people (or 3, as our friend Alexis is a frequent guest at our table), it’s when I’m throwing a dinner party for our food-loving Brooklyn friends. But for the past few days, Brad and I have had a house full of family – and teenagers! His cousin Kristi, her husband Matt, their 2 girls Tarah and Jolie and friend Nell have been in town. By day they headed out to tour NYC, and then night after night we all gathered together for a big family meal.

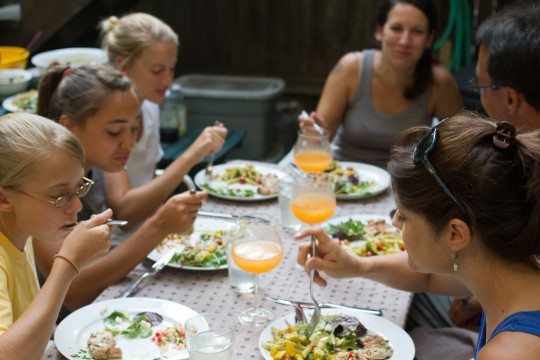
Summer Supper, Family Style (notice how quickly the food is disapearing off those girls' plates)

On Sunday, the crew followed Brad into the East Village for some Black Top Street Hockey action. I was pleased to learn later that my subtle suggestion that they head to Little Italy afterwards to pick up some cannoli was enthusiastically embraced. Since I had a few hours to myself, I offered to make dinner. I had some work to do that day as well, so I wanted to keep things simple and able to be pulled together without too much prep. I planned 2 of our stand-by dishes – a pasta and some grilled chicken – as well as some salads that I whipped up with produce I had grabbed at the previous day’s greenmarket.

Easy Seasonal Pasta and Salads

In my mind it was the perfect menu for 7, but as I was cooking it suddenly seemed like a lot of food. Well, let me tell you something I learned this week: Teenage girls can eat! Especially athletic, growing ladies (Tarah and Nell brought the family to the east coast from Colorado for some lacrosse tournaments). I was also a bit worried that there may have been picky eaters among us, but no. First bites were met with sounds of contented approval around the table. And then, as the adults slowly ate and chatted, I watched the girls go back for seconds, and then thirds!

I just love cooking for enthusiastic eaters (which is why Alexis is always welcome for dinner). You could say my meal was a success (did I mention, easy?!), and there definitely weren’t any leftovers.

Here’s my menu for a Simple Summer Supper, Family Style:

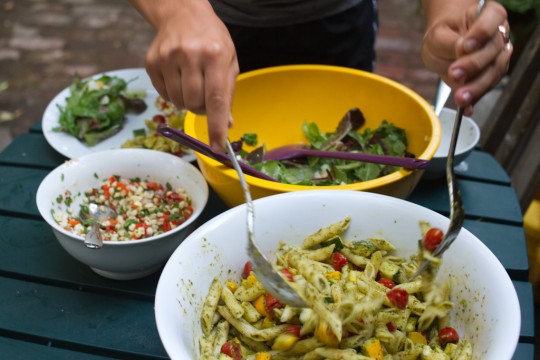
  • Penne with Summer Squash, Cherry Tomatoes and Pesto
  • Grilled Citrus Chicken Thighs, with Chives!
  • Corn Salad (with peppers, shallots and cilantro)
  • Mesclun Salad with Cucumbers, Feta, Peaches and Prosciutto

I recommend you drink lemonade with dinner and serve some cannoli for dessert. This whole thing can be prepared in about an hour, and you can enjoy a cocktail while you call everyone to the table and toss the chicken on the grill. Makes about 8 servings in total, recipes below…

Penne with Summer Squash, Cherry Tomatoes and Pesto

Penne with Summer Squash, Cherry Tomatoes and Pesto

This is seriously the easiest, most delicious, summer pasta. We eat it often throughout July and August.

  • 1 lb. Penne or other short pasta (Farfalle works well here too)
  • 4 medium zucchini or other summer squash, quartered lengthwise and then cut into 3/4″ pieces
  • 1 pint cherry tomatoes, halved
  • 1 cup Pesto (Make your own, it’s quick and easy. I usually have some frozen for last minute weeknight meals, or you could go store bought for ultra convenience)
  • Salt, pepper and Parmigiano-Reggiano cheese for serving

Bring a pot of salted water to a boil for the pasta. Cook for 5 minutes, then add the squash. Continue cooking for about 3-5 minutes more until the pasta is al dente and the squash is just tender. Reserve 1/2 cup of the cooking water and drain. Return the pasta and squash to the pot and add the cherry tomatoes, pesto, reserved water and toss to combine. Taste to see if it needs any salt and pepper, then transfer to a big serving bowl. Generously grate with cheese just before serving.

*This tastes great room temp, so feel free to prep and set aside.

Grilled Citrus Chicken Thighs, with Chives!

I love grilling whole chicken legs, but Brad and I often make these for big groups. Boneless skinless chicken thighs are inexpensive, cook up fast, and yield juicy, delicious results.

*Before you start cooking anything else. Prep the chicken to marinate and set aside:

  • 3 lbs. Boneless, skinless chicken thighs
  • 1/4 cup olive oil
  • 2 lemons, juice and zest
  • 2-3 garlic cloves, smashed and roughly chopped
  • Big pinch of cayenne
  • Salt and pepper
  • Handful of chives, chopped

In a large ziploc bag, toss the chicken thighs with the oil, lemon, garlic, cayenne, salt and pepper. Set the bag on a plate and allow to marinate for at least 45 minutes, turning once or twice, before grilling.

Grill the chicken thighs over a medium-high heat for about 4 minutes per side. As soon as they’re cooked through, remove them to a platter, and toss with chives and serve.

*My other variation on this is to sub lime for lemon juice, add a few chopped jalapeños (seeds and all) instead of cayenne to the marinade, and toss with cilantro at the end. My brother loves this recipe.

Corn Salad

  • 3-4 ears of corn (depending on size)
  • 1 bell pepper *or* 2 jalepeño peppers, finely chopped
  • 1/4 cup shallots, minced
  • Handful cilantro, chopped
  • 1 lime, juice
  • A few tablespoons olive oil
  • Salt and pepper

Grill or boil the ears of corn until just tender. When they’re cool enough to handle, cut the corn off the cob and add to your salad bowl. Add peppers, shallots, and cilantro.

Make a quick dressing of olive oil, lime juice, salt and pepper. Toss everything to combine and set aside until you’re ready to eat.

Sweet Juicy Peaches make for a great summer salad

Mesclun Salad with Cucumbers, Feta, Peaches and Prosciutto

  • Mesclun or whatever kind of good leafy greens you’ve got on hand
  • 1 Cucumber
  • 4oz. Feta
  • 2 Peaches
  • 2 oz. Prosciutto, sliced
  • Sherry Vinegar
  • Olive Oil
  • Agave Nectar
  • Salt and pepper

Start with a big bowl of salad greens. Peel the cucumber and slice lengthwise, use a spoon to scoop out the seeds, then slice into 1/4″ slices. Next cut feta into 1/2″ cubes. Cut prosciutto lengthwise into 1″ strips, then cut crosswise into 1/4″ pieces (I had some, so I added it – delish, but definitely optional). Peal the peaches and cut into 1/2″ pieces. Toss them with some lemon juice, strain them and add them with the cucs, cheese and prosciutto to the salad.

I made a simple vinaigrette with 2 parts olive oil, 1 part sherry vinegar, a squirt of agave nectar, salt and pepper. When you’re ready to eat, gently toss just with just enough dressing to lightly coat everything, being careful not to overdress or overtoss.

After dinners we had some great movie nights. The ladies were pretty excited about our video projector, and get this, had never seen Girls Just Wanna Have Fun – OR – Sixteen Candles! But don’t worry, we fixed that. We also beat the heat by strolling together to good old Uncle Louie G’s for ice cream cones.

Kristi and Matt took on dinner the next 2 nights, firing up the grill for burgers and brats, along with salads and other good stuff. What a treat to come home from a long day in the studio to find dinner just about ready to eat! Thanks guys.

*Matt’s secret burger recipe called for chopped, fresh spinach mixed in with the ground meat. Don’t ask about the rest – it’s secret. But know that I’ll be trying the spinach trick soon.

Start Shelling! Make Sweet Pea Risotto

We’ve been eating a lot of peas since mid-June. Freshly shelled, there is nothing better. The season for shelling peas is short, but the cold rainy Spring seams to be slowing down the parade of Summer produce and I’m still seeing plenty of these precious little guys at the greenmarket and our food coop.

Shelling - worth the effort

I’ve tried some new recipes, like a chilled pea soup with ginger and cumin (I riffed on a combination of this recipe and this one) and a Creamy Mussel Stew With Peas, Fennel and Lemon that Brad spotted in the NY Times Dining section (the latter inspired the flavors of my pea risotto). I even improvised on this recipe for a 4th of July potato salad and used them in place of green beans.

Sweet, Sweet Peas

In the Spring I often make Asparagus risotto, I love this recipe with barley and hazelnuts, but more often I make a traditional risotto using Arborio rice with the same asparagus puree technique. I started itching to make a sweet pea risotto this way the day I spotted the first shelling peas at the market.

Sweet Pea Risotto

I’m calling this my “peas de résistance” (ha!) for early summer recipes. I love the flavor of the fennel and lemon with the peas. It’s creamy, delicious, and it just sings with the bright tastes of summer.

Sweet Pea Risotto

  • 1.5 lb shelling peas (will yield about 1.5 cups)
  • 1 lemon, zest and juice
  • 3 tablespoons butter (divided)
  • 5 cups stock (I use chicken most often)
  • 3/4 cup finely chopped onion (1 small onion or 1/2 a larger one)
  • 3/4 cup finely chopped fennel (1 small bulb or 1/2 a larger one)
    *You can save a few fronds for garnish
  • 1.5 cups Arborio rice
  • 1/2 cup dry white wine
  • 1/2 cup freshly grated Pecorino Romano cheese
  • Salt and freshly ground black pepper to taste

Bring the stock to a simmer in a small stockpot on a rear burner. Bring a second pot with salted water to a boil. Cook the peas in the boiling water until tender – about 10 minutes. Drain and rinse under cold water to stop cooking. Transfer half the peas to a food processor with lemon juice and zest and puree (add a tablespoon or two of water if needed to get it smooth). Set aside with the remaining whole peas.

In a large, heavy, saucepan, melt 2 tablespoons butter over medium heat. Add the onion and fennel and cook, stirring often, until tender – be careful not to let them brown – about 8-10 minutes. Add the rice and stir to coat in the butter, then add the wine and simmer, stirring, until the wine is completely absorbed.

Begin adding the stock by the 1/2 cup, stirring slowly and frequently until almost completely absorbed, then add the next 1/2 cup. Continue cooking like this until you have about 1/2 cup of stock left (about 25 minutes). Taste the risotto – it should be tender with just a bit of firmness to the bite. Stir in the pea puree and whole peas with a final 1/2 half cup of stock. When nearly all the liquid is absorbed, stir in cheese, remaining tablespoon of butter, salt and pepper to taste. Transfer to serving bowls and serve immediately.

*My pal, Alexis, was asking me the last time I made this dish what the secret to risotto is. I told him to keep stirring! Seriously, slow and steady wins this race. You’re coaxing those rice grains to absorb nearly twice the liquid they normally would by slowly adding stock and stirring continuously over a moderate heat. So if you’re making this dish for guests and they ask “can I help with anything?” tell them, stand here and stir!

Now, you may be thinking it doesn’t get much better than that. But wait, there’s more.

Whatchu gonna do with leftover risotto? It doesn’t really reheat well, not to that perfectly creamy consistency it once was. Not to worry.

Wait for it…

These aren't leftovers, these are Risotto Cakes!

Risotto Cakes

The trick is to use the risotto straight out of the fridge. When it’s cold it’ll stick together so you don’t need an egg or anything to bind it.

Heat a pan to medium-high heat and melt a few tablespoons of butter (you can also use olive oil) – be generous, because you want the cakes to quickly brown and crisp up without sticking. When a drop of water sizzles in the pan, you’re ready to go.

Drop the risotto by heaping, rounded spoonfuls into the pan (sometimes I use my ice cream scooper), and with the back of a spatula, gently press them to flatten a bit. Let them fry, about 3 minutes a side, until a golden brown crust forms. Very gently, so as not to break the cakes or loose the crust, slide the spatula under, flip and repeat. When the cakes are lightly browned with crisp surfaces on both sides, carefully remove to plates.

This makes for an awesome lunch or dinner with a simple leafy salad on the side (for that sexy photo I dressed those suckers up with some pea tendrils – I know, you can barely handle it). Crispy and crusty on the outside with rich, creamy goodness in the center. You’ll never serve all the risotto again – I always save some for making cakes.

Oh, and if you haven’t had your mind sufficiently blown…

Pea Pod Vegetable Stock

Here’s another great idea. Don’t just trash those pods, make veggie stock with them and use it to make pea soup or risotto!

Feasting on Fish in Montauk

It’s been a bit quiet ’round this blog over the past few days, thanks to a mini-holiday Brad an I snuck away on late last week. I was booked to spend Friday on the set of a photo shoot in Southampton with one of our wonderful Bad Feather clients. Since we’ve been working like crazy around here, we headed out a day early to spend some time recharging in Montauk.

A hazy evening on a Montauk beach

Brad and I arrived Wednesday evening in time to stroll on the beach with Francine (who we dragged along with us) before heading to dinner. We decided to try one of the trendier restaurants to see what kind of dishes the local chefs are creating with seasonal ingredients. We had a great cocktail and some Blue Point oysters to start and enjoyed a great meal, even if we did break the date night rule and talk business most of the time. The most unique and memorable dish was cod, seared to a crisp and served in a light tomato broth with cherries and crispy kale. It was pretty outstanding.

On Thursday we hit the beach, relaxed and caught up on some reading. That afternoon we took a break from the sun and headed back out Montauk Highway to lunch at a roadside joint on some more oysters, Blue Point beer and some beach delicacies – a lobster roll and a fried flounder sandwich. My other motive for this afternoon jaunt was to hit up a farm stand and a seafood shop for dinner supplies.

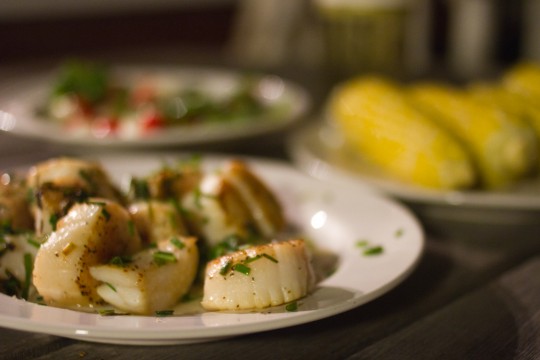
Summer night magic: Seared scallops with chives

After a short (thanks to the mosquito onslaught) hike at Montauk Point with Francine, we headed back to the beach for sunset and eventually back to our cottage to prepare a satisfying summer meal with the day’s treasures: local scallops – pan seared and tossed with chives, a simple ‘Caprese’ salad of cherry tomatoes, fresh ciliegine mozzarella (cherry sized balls) and basil leaves, some local sweet corn and a bottle of crisp white wine.

These are the simple dinners I dream of when we’re bundled up and bearing New York City winters. Sunned, tired and content, I would have done it all again the next day.

Make this salad: Figs, Prosciutto, Arugula and Pecorino Romano

Figs, Prosciutto, Aruglua and Pecorino Romano Salad

Last week Brad and I had a great dinner at James, a little restaurant in our neighborhood in Brooklyn that was participating in Edible Brooklyn’s “Eat Drink Local” week. One of the many delicious things we ate that night was a simple, yet decadent fig and prosciutto salad.

A few days later I spotted some fresh figs at our Food Coop and decided to make my own variation on it. I’m pretty certain this is going to be a new fave in our house.

Figs!

Figs, Prosciutto and Arugula Salad with Pecorino Romano

This is a rough estimation of a recipe, just use the best ingredients you can find (good olive oil and balsamic will make a world of difference) and you can’t go wrong. I’ll say it makes 4 servings as a salad course.

  • Fresh figs (I used Turkish Brown, but any fresh figs will be delicious), about 5-6
  • 2 tablespoons olive oil
  • 1 tablespoon balsamic vinegar
  • Salt and pepper
  • 1/4 lb. prosciutto (splurge on the Prosciutto di Parma, it’s worth it), thinly sliced
  • 1 small bunch Arugula
  • Pecorino Romano cheese, shaved for garnish

Cut the stem and the base off the figs, cut in half lengthwise, then into strips. Cut the strips into 1/2 inch pieces. Toss the figs with the olive oil, balsamic, and a bit of salt and pepper to taste. Allow to rest for a few minutes.

Compose the plates: Lay the pieces of prosciutto in a single layer on the plates. Pile the arugula on top, then scatter the figs (give them a good toss first) over the arugula, drizzling any remaining dressing. Top with shavings of Pecorino Romano.

*Bonus: Here are some handy facts on figs and how to store and cook them from The City Cook.

Red, White and Sour Cherry Cobbler

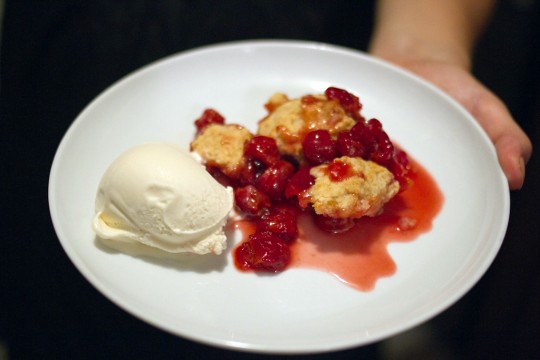
Sour Cherry Cobbler with Vanilla Ice Cream

The only thing that was patriotic about my 4th of July weekend…well, actually nothing was. I barely even acknowledged the “holiday” save for a BBQ with some good friends last night.

I did have some vision of beautiful raspberry and blueberry pies at one point, and thinking I might be so ambitious as to move beyond eating blueberries by the handful (I guess we also eat them in yogurt and if I ask nicely, Brad might make these pancakes), I spent some time on Sunday searching the Gourmet archives. Here are some of the blueberry recipes I’m considering for a project next weekend:

The recipe I eventually decided to take on this past weekend on was not for blueberries, but for sour cherries, which I was super excited to find had arrived at the greenmarket. The farmer told me they wouldn’t be any better than they were on Saturday, that the trees had bloomed beautifully and it was a great harvest. Since I’m not really a baker, I was intrigued by this seemingly simple Sour Cherry Cobbler, and am happy to report that the recipe was perfect. Easy to make and hot damn was it delicious.

Sour Cherries

I happened upon this post on The Kitchen blog about using chopsticks as a cherry pitter. Convenient, as this is a kitchen implement that I do not own. Sure enough, the chopsticks worked like a charm – out popped the pit.

Pitted cherries, ready for cobbler.

Once I had 4 cups of sour cherries all pitted and ready to go, I combined them with some sugar, lemon juice and a bit of cornstarch. Cherries aside, I set to making the very simple (light and buttery) cobbler dough, and was ready to roll.

Using my cast iron skillet, I brought that sugary, sour cherry mixture to a boil. Next step, drop spoonfuls of the dough into the cherries, and pop the whole thing in the oven to bake until the tops of the cobbler bits are golden brown.

Sour Cherry Cobbler

I let the cobbler cool while we ate dinner, although it would of course be delicious warm out of the oven. All that really matters is that you serve it ‘a la mode’.

I’m already craving more of those delicious sour cherries, but I’m sure I’ll be adapting this cobbler with other fruit (did someone say peaches?) for the rest of the summer.

Here’s the link to the recipe, originally published in Gourmet, July 1991.

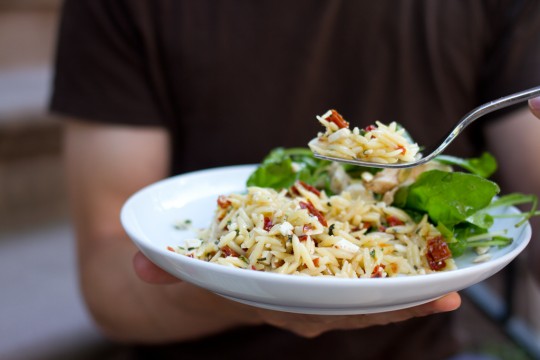
Picnic Perfect: Sundried Tomato and Feta Orzo

What makes this orzo so picnic perfect? Well, besides the fact that it’s easy as hell to assemble and yields a lot of servings (especially if those servings are a scoop on a plate with lots of other BBQ goodness), it tastes best if you assemble in advance and allow it to cool to room temperature before serving. In other words, whip it up and pack it up, it’ll be ready when you are.

Orzo with Sundried Tomatoes and Feta

Brad and I have become picnic professionals these days. Our backyard, where we typically enjoy breakfast, lunch and dinner throughout the warm months of the year, has been under construction (actually it’s the back facade of the house that’s being worked on) and off limits to us for about 4 weeks now. Feeling desperate to eat outdoors, weather permitting, we’ve gotten into the habit of bringing a picnic lunch out to our front stoop.

Lunchtime Stoop Picnic

Sundried Tomato and Feta Orzo

  • 1 16 oz. package orzo
  • 6-8 oz. sundried tomatoes (not packed in oil), cut into 1/4″ pieces
  • 6-8 oz. feta, cut into 1/4″ pieces
  • 1/4 cup shallots (1 large or a few small), minced
  • Generous handful of parsley and/or mint, chopped
  • 1/4 cup olive oil
  • 2 tablespoons sherry vinegar (you can also use red wine vinegar)
  • salt and pepper

Cook the orzo in salted, boiling water until al dente. Reserve 1/2 cup water before draining. Toss the cooked orzo with the sundried tomatoes, shallots, 1/4 cup of reserved water, olive oil, and salt and pepper to taste, until evenly mixed (add more water if the mixture seems dry). Add the feta, herbs and vinegar and toss until just combined. Serve immediately or allow to cool to room temperature.

*Full disclosure, I never really measure this stuff, especially the oil and vinegar – I’d say a few generous swirls of oil and a splash of vinegar.

*In the summer when they’re in season, I replace the sundried tomatoes with roasted red peppers.

Makes about 8-10 generous side dish servings. This dish is a great side for grilled or roasted chicken, and is most definitely enjoyable the next day.

Breakfast with Brad: SuperFood Smoothies

In my house the food and kitchen detail breaks down to something like this: I do the bulk of the shopping, prepare lunch and cook dinner. Brad makes breakfast and does the dishes. I’m not sure when or how we arrived at this arrangement, but I’m certain it has a lot to do with the fact that I am one hell of a sleeper and the first few hours of the day are, well, “difficult” for me. And so Brad wakes up first, feeds the pets, starts some coffee and sets to feeding us – turns out the one sure way to get me out of bed is to tell me there is good food waiting. As for the whole dishwashing thing? Let’s not question that, but be sure to tell Brad when you see him that he’s doing a really great job at keeping out kitchen clean.

So Brad has a breakfast repertoire. It varies a bit by our seasonal cravings, but involves such things as scrambled or perfect fried eggs (he says this isn’t something to brag about, I can’t fry perfect eggs to order so I say it is), peanut butter oatmeal, french toast, yogurt and granola, or smoothies. The other day I asked Brad if we could have smoothies for lunch so I could document his process that usually takes place while I’m still under the covers.

The Process:

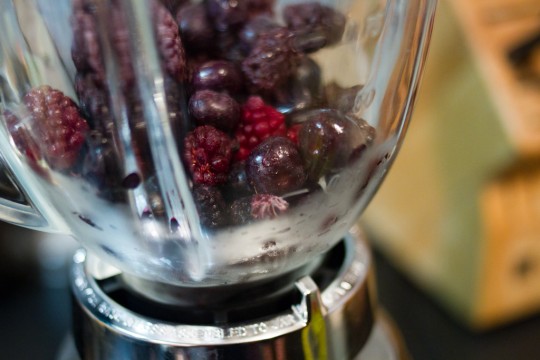
Start with the fruit. The mixed berries are my favorite, not to mention loaded with antioxidants, but Brad says you can use any fruit you want, such as mangoes, strawberries, or peaches.

Add the 3 secret ingredients:

  • Flaxseed oil – which is not a SuperFood itself, but according to a book I checked, flaxseeds are a “Super Sidekick” to oats and a great source of omega-3 fatty acids.
  • Acaì – Brad says this is also a powerful antioxidant and blah, blah, blah (we get these “smoothie packs” at our Food Coop)
  • Agave nectar – a most awesome natural sweetener

Next add some almond milk, a heaping spoonful of peanut butter (we like the hippy stuff) and some plain yogurt. Brad used to use soy milk and add whey protein powder, but switched to almond milk and peanut butter for protein, which also adds lots of vitamins and fiber to the mix. This smoothie is the true breakfast of champions.

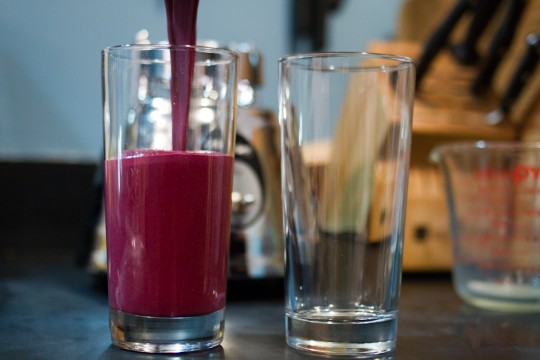
Blend and pour.

The Recipe:

Makes 2 smoothies.

  • 8-10oz. frozen fruit
  • 4 ounces acaì (Brad says this is optional, but awesome)
  • You could also add a banana
  • 1 cup almond milk, soy milk, or other type of milk (Brad prefers unsweetened)
  • 2 tablespoons flaxseed oil
  • 2 tablespoons peanut butter
  • 1 tablespoon agave nectar (honey is a good substitute)
  • 1/4 cup plain yogurt

Francine likes to get her SuperFood on too.

Pilgrimage to Bethlehem

I’ve always been a hot dog girl. As a kid I never chose the burger. To this day I’m not a sports fan, but you can take me to a ball game as long as we can enjoy some hot dogs and beer. Of course I love me some farm-raised pork hot dogs in lamb casings, hold the nitrates. But I’ll detour for Grey’s Papaya and I’ll wait in line at Nathan’s with the best of them. I’ll take any old dog off the grill with mustard, it’d be great if you could toast the bun. I do draw the line at dirty water dogs – I’m sorry but a hot dog floating in the same old water all day just doesn’t tempt me.

Have I mentioned I love hot dogs?

That's me, at Pete's

This weekend Brad and I drove to a family party in Pennsylvania. A family reunion of sorts where we celebrated my great uncle’s birthday, spent time with my grandma, caught up with cousins, aunts and uncles, ate too many cookies and played some good old lawn games. On the way home we thought we should break up the 5 hour drive with a destination of some kind. We contemplated outlet shopping, but of course we decided on a food pilgramage.

We considered a trip through Pennsylvania Dutch or Amish country for a farm-to-table experience, but after a quick Road Food search, I was convinced a 40 mile hot dog detour was our best option. They had me at fried pierogies – that’s right, fried pierogies.

Chili Dogs, the secret is safe with Pete

Our destination: Pete’s Hot Dog King in Bethlehem, PA. I feared that we would arrive to the disappointment that is a closed sign (it was Sunday afternoon), but we were greeted by two cheery young girls at the counter and proceeded to order our lunch. The menu: Hot dogs, house-style with mustard, chili and onions, fried pierogies and A-Treat birch beer soda, locally bottled by the Pennsylvania Dutch since 1918 – and you thought they only made pretzels.

As if pierogies could get better...these ones are deep fried

I left smiling, with the memory of chili dogs and the taste of fried cheese and potato pierogies lingering in my mouth, telling Brad, “you know this place is only an hour and a half from Brooklyn according to the GPS”. Did I mention I’m a hot dog girl?

Grab Your Spices: Make Swiss Chard and Red Lentil Curry

Last week I had an email conversation with my friend Joe, who knows his way around the kitchen, especially with a dutch oven and a big cut of meat. He told me he was happy to see my Kale Salad recipe because he doesn’t know what to do with all the greens he gets from his CSA. Actually, he said,

…any recipes you have for kale / swiss chard / collards would be welcome. I can only get down with so much “sauteed with bacon and an assload of garlic” before I just give up and stop picking up the greens, which makes me feel shame.

In our house we eat an “assload” of greens every week. In addition to kale salad or the standard garlicky saute, I put piles of spinach, kale, chard, collards, and bitter greens like broccoli raab or chicory into pasta, soup, curry, even tacos. Joe, I got you buddy. Say no to shame and yes to those greens!

That same night I took a peek in the fridge and discovered a big beautiful bunch of swiss chard. It was a cool, damp night and I decided to make one of our standby dishes, a curry with red lentils and chard for which I had all the other ingredients on hand.

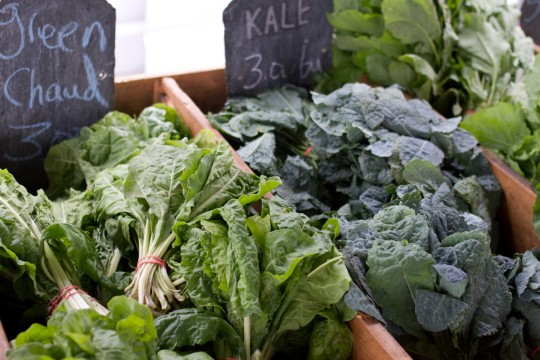
MmmMmmMmm, chard and kale!

Now, let’s talk about spices. I really never keep ground spices on hand (save for a few that are more commonly sold and stored ground). Storing spices whole keeps them fresher longer, and they’re fragrant and flavorful when you grind them as you need them. I love to make my own spice blends for curries and stews, or to add to marinades or rub on meats. This is not as intimidating as it seems. The hardest part is stocking your spice cabinet, which is worth a trip to a specialty shop that sells spices in bulk. If you buy them by the jar at the grocery store, you’ll likely be paying an “assload” thanks to the ridiculous markup that is standard for packaged herbs and spices.

Once you’ve got a stocked cabinet, all you’ve got to do is reach in there, measure your chosen mix of spices into your grinder, buzz and proceed. If a recipe calls for cumin, toss a big pinch of cumin seeds in there, grind and go. Your taste buds will thank you. But first, you’ll need to invest a whopping $10 or so into one important tool – a spice grinder (otherwise known as a coffee grinder, but no coffee in this one). Use it for spices only!

My fancy tool for spice making, a coffee grinder

Then collect the spice blend. Here’s my standard spicy curry mix:

Spices for Curry

Pictured above, counter clockwise from the top: That pile of orange is turmeric, the key to curry as it gives it it’s golden color. My friend Hardeep, who is Indian, swears by its healthful qualities and puts it in everything. (I keep this one ground, because that dried root you see in the picture? It’s a you-know-what to grind up). Those green pods are cardamom. I actually toss the whole pods into the pot and fish them out at the end, but if you have cardamom seeds (little brown guys inside those pods), toss them in the grinder. Black peppercorns, coriander seeds, cumin seeds and 2 deliciously spicy chilies I grew in my backyard and dried last summer – I’ll crumble them in seeds and all, but feel free to discard the seeds or use less chili to your taste. In the center, just to the left of those chili peppers, are fennel seeds, and finally a few whole cloves.

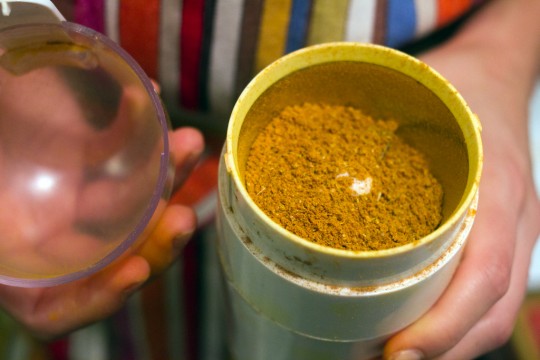
I suggest you go with pinches and palmfuls and be completely unscientific about measuring your spices. It really doesn’t matter as long as you have the general proportions correct. Next step, grind. Your curry will look like this:

Fresh ground spices, all ready to go

If you’re short on spices or looking for a really quick and convenient dinner, keep a good store bought curry on hand and sub that in the recipe, adding some dried chili to the pot.

Let’s get on with the recipe, shall we? So I grabbed an onion, some garlic, rinsed and chopped that swiss chard (rinse first, chop second, or you’ll be rinsing out nutrients that could have been in your food). Once I had my spice blend all ground up I was ready to roll. This dish is fast and easy to prepare.

Swiss Chard and Red Lentil Curry

Swiss Chard and Red Lentil Curry

  • 2 tablespoons neutral oil (I like safflower)
  • 1 large onion, chopped
  • 3 cloves garlic, minced
  • 3 tablespoons curry blend, plus a few cardamom pods for the pot *if you’re using a store bought curry, add 1-2 dried chili peppers, crumbled
  • 1 bunch swiss chard, stemmed and coarsely chopped
  • 1 cup coconut milk
  • 3 cups stock (veggie or chicken)
  • 1.5 cups red lentils, picked over and rinsed
  • 1 cup fresh shelled sweet peas *optional, I added these because they’re in season and were on hand
  • Plain yogurt, pinch of cayenne and a wedge of lemon for serving *optional, but recommended
  • Cooked basmati rice for serving on the side *Start your rice in a pot on the side before you set to the curry

Heat the oil in a wide pot or a large saute pan over medium heat. Cook the onion until it is nice and golden, about 10-12 minutes. Add the garlic, curry, chili if adding separately, and cardamom pods. Continue to cook for about 2-3 minutes, stirring often until the mixture is sticky, fragrant and has darkened a bit in color. Toss the swiss chard in (don’t worry if it looks like a ton, it’ll cook down), add the coconut milk and stock and stir together. Raise the heat and bring to a boil. Add the red lentils, reduce to a simmer and cover for about 10-15 minutes, stirring occasionally, until the lentils are tender. If you’re using the peas, add them the pot with about 5 minutes to go.

Taste and season with salt if desired. Serve the curry with the rice on the side, a wedge of lemon, and garnish with a dollop of yogurt and a little pinch of cayenne. And yes, this tastes awesome the next day when all those spices have really melded.

*If you don’t have stock, use 2 cups coconut milk and 2 cups water. Don’t have coconut milk? Use 4 cups stock.

*We ate it with buglar because I didn’t have any rice on hand, which made for an extra healthy meal. I prefer traditional basmati, but a long grain brown rice is also delicious.

Actual spice breakdown (I think):

  • 2 tablespoons ground turmeric
  • 1 teaspoon cardamom seeds or 4 whole pods for the pot
  • 1 tablespoon black peppercorns
  • 2 tablespoons coriander seeds
  • 1 tablespoon cumin seeds
  • 1 tablespoon fennel seeds
  • 5-6 whole cloves
  • 1-2 whole dried chili peppers

Oh, and Joe – if curry aint your thing? Try these Swiss Chard Tacos. More ‘Eat your Greens‘ recipes to come.